Test benches are facilities equipped with measuring instruments for testing machines, devices, components or materials for certain properties, in particular functional reliability, operational safety, behaviour under prolonged load or at high speeds. In order to guarantee the most accurate measurement results as well as exact reproducibility and scalability of test procedures, hardware and software components must be carefully selected so that they enable perfect interaction in the test stand. As an important integral component in the drive train of test benches, shaft couplings have to meet the most varied and diverse requirements.
High power density in the high-speed test rig

High-speed test benches are playing an increasingly important role in today's test scenarios, as extensive knowledge about the mechanical material behaviour or the noise development of a wide variety of materials or components in ever higher speed ranges is to be gained in test procedures. Speeds of 15,000 min-1 and more are the order of the day on these high-speed test benches. In order to be able to output exact measurement results, the developers of these test systems pay special attention to an optimal running smoothness of the entire drive train at these high speeds. For the shaft couplings to be used, this means that they must be designed to cope with the high speeds and minimise unbalance in order to achieve optimum smooth running of the drive train in combination with the other components.
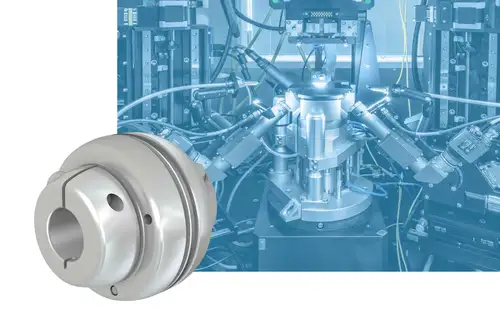
For the drive unit of a test bench, a high-speed coupling had to work precisely in a speed range of up to 16.000 min-1. In addition, the coupling had to have compact dimensions and at the same time the highest possible torsional stiffness and torque capacity. The Servoflex SFF-050 servo disc coupling is used. Its layered, flexurally discs made of stainless steel form a disc pack with pronounced torsional stiffness.
The coupling with an outer diameter of 48 mm is short as a single-cardanic version with an overall length of 48.4 mm and thus meets the demand for a space-saving coupling solution paired with a high power density. The backlash-free coupling has a torsional stiffness of 32.000 Nm/rad and is designed for speeds up to 18.000 min-1. In these high-speed test benches, it is not uncommon for the balancing couplings to also have to be dynamically balanced to a balancing quality of G 2.5 at a defined reference speed.
High angular and radial misalignment compensation in the transmission test rig

In order to connect the measuring shaft and the respective gear to be tested in a gear test bench, the coupling to be used had to compensate for the accumulated angular and parallel misalignments resulting from axle distance and positioning adjustments. The Loewe GK 35 of the Torque series proved to be predestined for this task. This coupling combines the kinematic properties of an universal joint with those of a cross-slide coupling. This means that the centre part of the joint coupling can perform a combined swivelling and sliding movement in the self-lubricating high-performance plain bearings, which are pressed into the respective aluminium clamping hubs. As a result, the coupling compensates for parallel displacements of up to 1.5 mm or angular displacements of up to 3° in a short overall length of 37 mm. The axially stiff coupling with an outer hub diameter of 35 mm is suitable for nominal torques up to 7 Nm.
High universal displacement and torque up to 9.000 Nm in the material test rig
Component materials are often tested on test benches with regard to their mechanical load capacity. The types of stress can vary depending on the component. For example, components can be tested for tensile and bending loads, for opposing displacements, for torsional loads or for all three of these loads together due to multi-axial external loads. In one of these material test stands, the respective test specimen is tested in the latter procedure. To connect the pulse cylinders with the test specimens, the coupling had to allow a correspondingly high universal displacement capacity according to the combined load type in order to exclude effects of the test specimen deformation on the loading process. For the integration of the coupling, only a limited axial installation space was available, so that the coupling to be used had to have compact dimensions. But not only the requirements regarding universal misalignment and compactness were high. Robustness and a high torsional stiffness as well as a high torque capacity of up to 9.000 Nm were basic criteria for the coupling. In addition, a frictionally engaged shaft connection in the form of conical hubs was desired.
For this requirement profile SCHMIDT-KUPPLUNG designed with the Omniflex RGF 16.32/2 a customised coupling solution exactly adapted to these technical basic conditions. The coupling offers a high universal displacement capacity in combination with a compact design. The explanation for this symbiosis lies in the kinematics of the coupling system. This is based on a so-called parallel link system. With this coupling principle, the rotary movement and torque are transmitted by means of two pairs of parallel links offset by 90°. They connect the input and output sides with the centre disc. Adapted spherical plain bearings operate in the coupling links.
The coupling in clamping hub design has compact dimensions with an outer diameter of 325 mm and its nominal length of 267 mm. Despite this compactness, it allows a high universal misalignment capacity of up to 3° angularly, up to 20 mm radially and up to 6 mm axially.
Pure precision and dynamics in the universal test bench

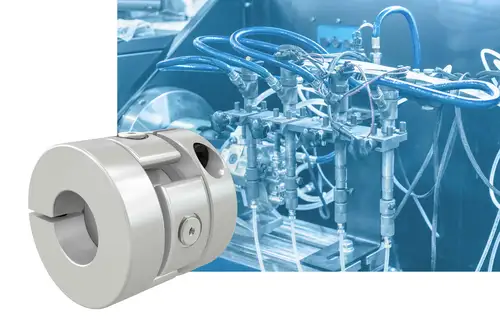
On universal test benches for electric motors, small motors and servo motors are evaluated with regard to key figures such as torque, speed, voltage or frictional torque. The recording of these provides important conclusions about the efficiency of the respective test specimen. In addition to the lowest possible mass moment of inertia, the precision of the coupling to be used plays a decisive role in achieving the most accurate measurement results. The Spinplus SP10-A is used in such test systems. In addition to a high torque transmission capacity and torsional stiffness, the Spinplus offers the lowest possible mass moment of inertia. The reason for this is the functional element responsible for the functional values and performance parameters of the coupling. This enables universal misalignment compensation - i.e. compensation of radial, axial and angular shaft misalignments - in one plane. This capability gives the backlash-free coupling the advantage of a very short design and a high power density, combined with a minimised mass moment of inertia.
The coupling has a mass moment of inertia of only 125 gcm2. In combination with its high torsional stiffness, it meets the demand for the most precise measurement results in the dynamic motion sequence. Despite the compact design of 40 mm with an outer diameter of 39.5 mm, the lightweight coupling enables shaft misalignment compensation of up to 0.2 mm radially, up to 1° angularly and up to 0.3 mm axially.


